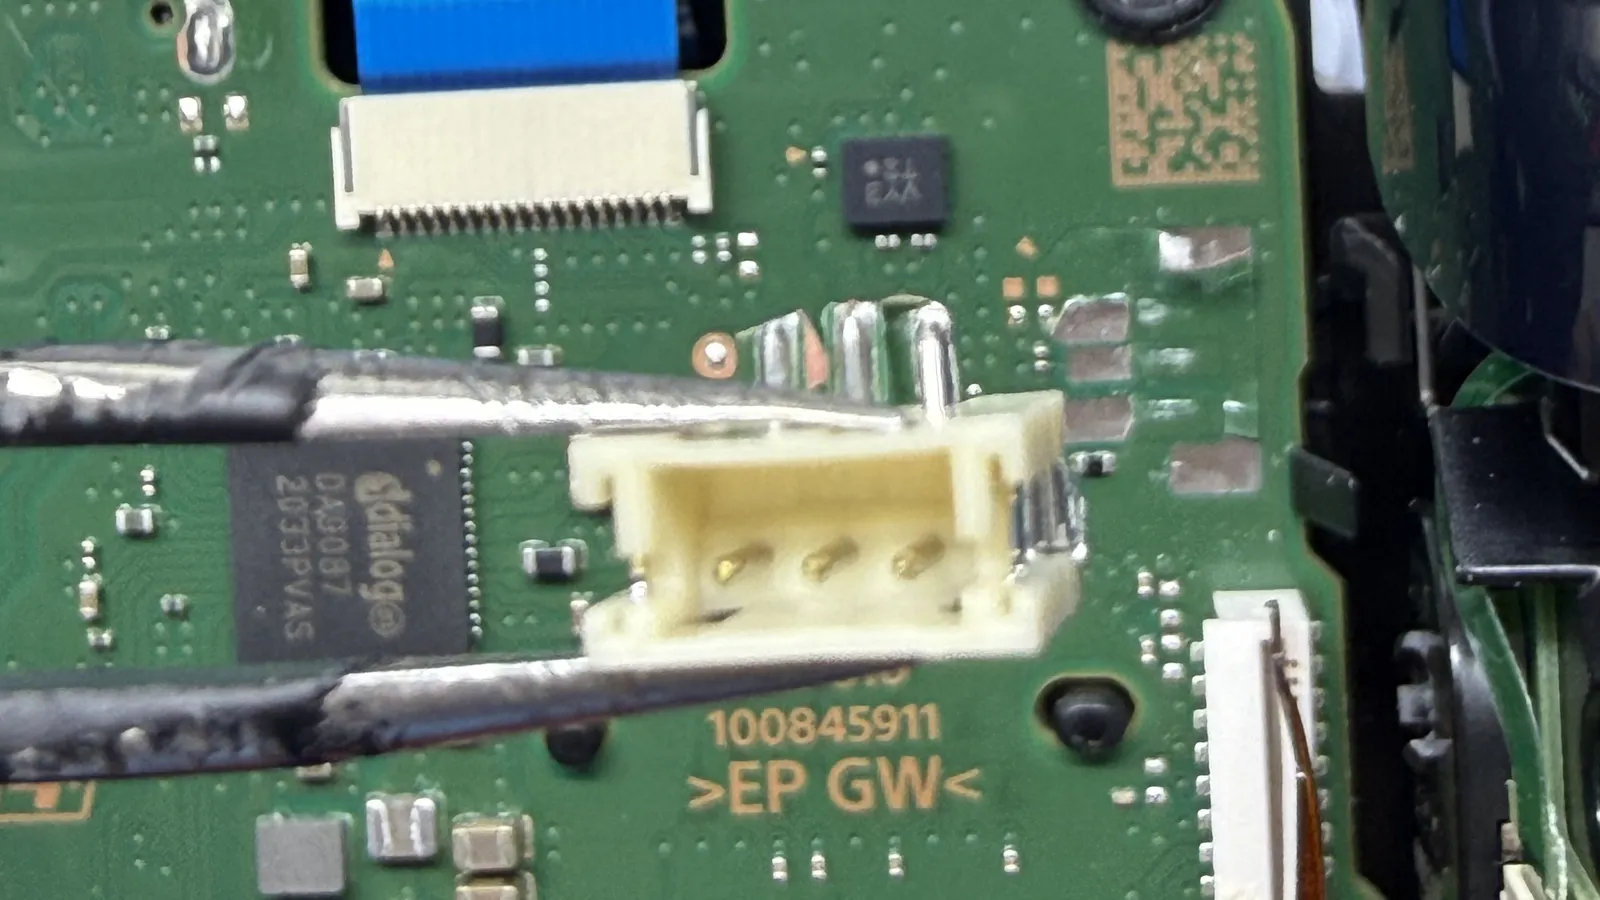
A DualSense Battery Swap Is Usually Simple
There is no shortage of video tutorials for this, and for good reason. You open the shell, lift out the old battery, unplug its cable from the board, and plug in the new one. No soldering, no special parts beyond the battery itself. When it goes right, it takes a few minutes and gives an old controller hours of extra play time.
The risky step is unplugging the old cable. The connector on the board is tiny, and it is held in place only by a few small solder joints. It is designed to be plugged in once at the factory, not pulled out by hand, so it does not take much force in the wrong direction to break it.
How the Battery Connector Breaks
In almost every case we see, the connector failed for one of these reasons:
- Pulling the wires: tugging on the red and black wires instead of the plug puts all the force on the connector's solder joints.
- Prying upward: levering the plug up with a screwdriver lifts the whole connector off the board instead of sliding the plug out.
- Wiggling side to side: rocking a tight plug back and forth cracks the solder joints a little more each time.
- Metal tools: a slip with metal tweezers can crack the plastic housing or short the battery terminals.
The safe way is to grip the plug body itself, not the wires, with plastic tweezers or a nylon spudger, and slide it straight out, parallel to the board, with slow and steady pressure.
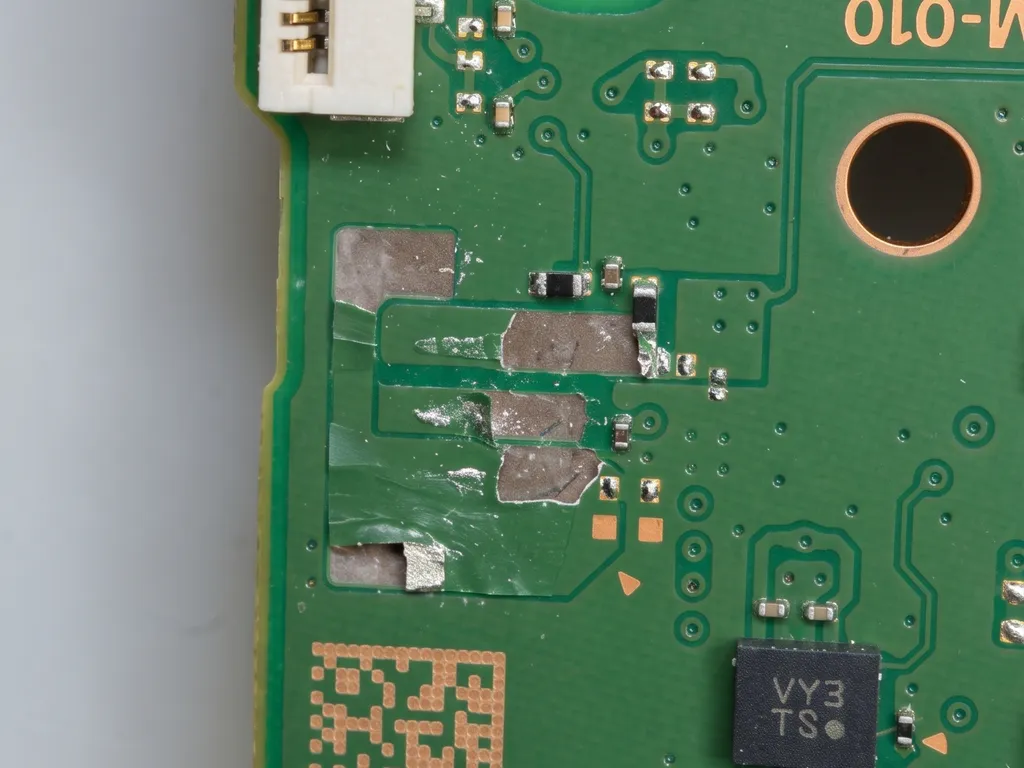
What the Damage Usually Looks Like
Not every broken connector is the same repair. On the bench, the damage falls into three levels:
- Cracked housing: the plastic broke but the connector is still soldered to the board. The connector is replaced and the pads are untouched.
- Connector off, pads intact: the solder joints gave way but the copper pads stayed on the board. A new connector is soldered onto the original pads.
- Pads or traces torn: the connector took the copper pads with it, like in the photo above. The missing pads and traces have to be rebuilt before a new connector can be installed.
Why It Becomes a Microscope Repair
The pads under a DualSense battery connector are only a few millimeters wide and sit next to other small components on a multi layer board. Fixing them is component-level motherboard repair: under a microscope, the area is cleaned, the damaged traces are traced back to a solid point, and thin copper wire is used to rebuild the connection. The repair is sealed with UV curing solder mask, a new connector is soldered in, and the battery voltage and charging are tested before the controller is closed.
Done this way, the controller works like it did before the battery swap. It is precise work, but it is a very common bench repair, and it saves a controller that would otherwise end up in a drawer.
What Not to Do If It Already Happened
- Do not try to solder the battery wires straight onto the board with a large iron. Too much heat lifts more pads and makes the repair harder.
- Do not twist the wires together, tape them to the board, or glue the connector back in place. A loose lithium battery connection can short.
- Do disconnect the battery and keep it away from the board, and save the broken connector in a small bag in case it helps identify the part.
We repair DualSense controllers like this regularly at our Hialeah shop for customers from across Miami-Dade, many of them after a DIY battery swap that almost went perfectly. Our PS5 Controller Repair page covers battery, charging, and board repairs for the DualSense.
Frequently Asked Questions
Can a broken PS5 controller battery connector be fixed?
Yes, in most cases. If the connector broke or came off the board, a technician can solder a new one in place. When the copper pads tore off with it, they are rebuilt under a microscope with fine copper wire and solder mask first, so the controller charges and powers on normally again.
How do I unplug a DualSense battery without breaking the connector?
Grip the plastic plug itself, never the red and black wires, using plastic tweezers or a nylon spudger. Slide it straight out, parallel to the board, with slow and steady pressure. Avoid prying it upward or rocking it side to side, because that cracks the small solder joints holding the connector.
Can I solder the battery wires directly to the board?
It is not recommended. The pads are very small and easy to lift with too much heat, and a weak joint on a lithium battery can short or come loose inside the controller. Installing a new connector on properly rebuilt pads is safer and lets the battery be replaced again later.